
Guides

Claude Prompts
Guides

πŸ“–7 Claude Prompts That Make Reading Any Book Effortless and Brilliant

Somewhere on your shelf β€” or in your Kindle library, or that “read later” folder β€” there’s a book you’ve been meaning to get to for months. Maybe years. It’s not that you don’t want to read it. It’s that between the house, the kids, the errands, and everything else pulling at your attention, sitting down with a 300-page book feels like a luxury you don’t have time for. If this sounds familiar, utilizing strategic Claude prompts can completely change how you learn. You don’t need to read every page to actually understand a book… Here’s the good news: you don’t need to read every page to actually understand a book. With the right prompts, you can use Claude to read any book in 20 minutes β€” not by skipping it, but by getting a genuinely useful, structured extraction of its core ideas, arguments, and takeaways. This isn’t about faking your way through a book club conversation. It’s about deciding, quickly and clearly, whether a book deserves your full attention β€” and if it does, walking in already knowing its shape. Below are 7 Claude prompts that do exactly that, in order, so you can move from “I have no idea what this book is about” to “I actually understand this” in about the time it takes to make and drink a cup of chai. [Image 1 β€” alt text: “reading a book in 20 minutes using Claude prompts”] 🧭 Why Using Claude Prompts for Nonfiction Works Before the prompts, a quick honest note: this method won’t replace deeply reading a novel for pleasure, or a book you’re studying line by line. What it is great for is nonfiction β€” self-help, business, psychology, productivity, parenting, finance β€” the kind of books where the author usually has 3-5 core ideas stretched across 250 pages of examples and repetition. Claude can’t “read” a physical book you haven’t uploaded anywhere, so these Claude prompts work best when you have some text to work with β€” a PDF, an ebook excerpt chapter summaries you’ve found online, or even the book’s table of contents and introduction, which often reveal the entire argument. Think of this as building a map of the book quickly, then deciding where you actually want to walk. 1️⃣ The Core Argument Prompt Start here, always. Before diving into details, you want the one-sentence version of what the entire book is trying to say. Prompt: “Based on [book title/author, or the text I’ve pasted], what is the single core argument or thesis of this book? Explain it in 2-3 sentences, as if explaining it to someone who has never heard of it.” This immediately tells you whether the book is even relevant to what you’re trying to learn β€” and saves you from digging further into something that isn’t actually what you need. 2️⃣ The Chapter Map Prompt Once you know the core idea, you need to see how the author builds their case, chapter by chapter. Prompt: “Give me a chapter-by-chapter breakdown of this book. For each chapter, summarize the main point in one sentence.” This turns a 300-page book into roughly a one-page map. You’ll immediately spot which chapters are foundational and which ones are likely just extended examples of a point already made. [Image 2 β€” alt text: “chapter by chapter book summary using AI”] 3️⃣ The Key Frameworks Prompt Most nonfiction books are built around 2-4 memorable frameworks, models, or step-by-step systems. This is usually the actual “value” of the book β€” the part people actually apply. Prompt: “What are the key frameworks, models, or step-by-step systems introduced in this book? List each one with a short explanation of how it works.” This Claude prompts approach alone often gives you 80% of what you’d have gotten from reading the whole book β€” because frameworks are exactly what most readers try to remember and use afterward anyway. 4️⃣ The “What Would Change My Life” Prompt This is where you personalize the extraction instead of just summarizing it generically. Prompt: “If I only had time to apply 3 ideas from this book to my own life or work, which 3 would have the biggest impact, and why?” Claude will use its understanding of the book’s content to prioritize for you β€” which matters, because not every idea in a book is equally useful, and most books bury their best insight somewhere in chapter 6. 5️⃣ The Counterargument Prompt A book that only tells you what the author believes is only half the picture. This prompt adds critical thinking to the mix. Prompt: “What are the strongest criticisms or counterarguments to this book’s main thesis? Are there any perspectives the author doesn’t fully address?” This step matters more than people expect. It stops you from absorbing an idea uncritically just because it was well-written, and it gives you talking points if the topic ever comes up in a conversation or a book club. [Image 3 β€” alt text: “critical thinking prompt for book summaries”] 6️⃣ The Real-World Examples Prompt Sometimes the abstract ideas of a book only click once you see them applied. This prompt pulls out the most memorable, concrete stories. Prompt: “What are the most memorable real-world examples, case studies, or stories used in this book to illustrate its main points?” These examples are usually what people actually remember and repeat months later β€” far more than the theory itself. If you’re planning to reference the book in conversation, these are your anchor points. 7️⃣ The One-Page Cheat Sheet Prompt Finally, bring everything together into a single reference document you can actually revisit. Prompt: “Combine everything we’ve discussed about this book into a single one-page cheat sheet: the core argument, the key frameworks, the top 3 actionable ideas, and one memorable example for each. Format it so I can skim it in under 2 minutes.” This is the artifact you keep. Save it in your notes app, your Claude project, or wherever you already store your reading notes


AI productivity hacks
Guides

3 AI Productivity Hacks to Reclaim 5 Hours of Your Week (Without the Hype)

Every week there’s a new AI tool promising to change your life. New app, new plugin, new “game-changing” workflow β€” and somehow, you still end up spending your evening doing the same manual, repetitive tasks you were doing a year ago. Here’s the truth: you don’t need ten new tools to save time. You need AI productivity hacks that are simple, boring even, and that quietly work in the background of your actual life. No hype, no 40-tab tutorials β€” just three practical ways to get real hours back this week. πŸ• Why Most “AI Hacks” Don’t Actually Save Time So many productivity posts hand you a giant list of 20 tools and call it a day. But more tools usually means more decision fatigue, more tabs open, more time spent figuring out how to use the tool instead of actually getting anything done. The real shift happens when you choose smart AI productivity hacks that the system is genuinely good at, letting it quietly manage the workflow every single week. handle those β€” consistently, every single week. That’s the mindful approach: fewer tools, used well, instead of more tools, used badly. Here are three specific hacks that do exactly that. πŸ“ Hack 1: Use AI Productivity Hacks to Summarize Messy Meeting Notes If you’ve ever sat in a meeting scribbling half-sentences, only to look at your notes an hour later and have no idea what you meant β€” this one’s for you. The old way: You take rough notes during the call, then spend 20–30 minutes after the meeting rewriting them into something coherent, pulling out action items by hand. The mindful AI way: Paste your raw, messy notes β€” bullet points, typos, half-thoughts and all β€” into a tool like ChatGPT or NotebookLM, and ask it to do the cleanup for you. Try a prompt like: “Here are my raw meeting notes. Summarize the key discussion points in 3–5 bullets, then list any action items separately with who’s responsible if mentioned.” That’s it. In under a minute, you’ll have a clean summary and a clear action list, instead of a messy page you’ll never look at again. Time saved: roughly 20–25 minutes per meeting. If you sit in even 4–5 meetings a week, that’s already over an hour and a half back in your pocket. πŸ“š Hack 2: Let AI Organize Your Reading List Most of us have some version of the same problem β€” a graveyard of saved articles, bookmarked blog posts, and “read later” links that we never actually read later. It’s not a discipline problem. It’s an organization problem. The old way: You save the link, tell yourself you’ll get to it, and then lose it in a sea of fifty other saved links. The mindful AI way: Once a week, batch-process your reading list instead of trying to read everything as it comes in. Drop your list of saved links or article titles into an AI tool and ask it to group them by topic and give you a one-line summary of what each one likely covers. A simple prompt: “Here’s my reading list of saved article titles and links. Group them into 3–4 categories and give me a one-line description of what each is likely about, so I can decide what’s actually worth reading this week.” This turns a chaotic pile into a short, scannable list β€” and you get to consciously choose 2–3 things worth your time instead of feeling guilty about the other 47. Time saved: roughly 30–40 minutes a week that would’ve gone into aimless scrolling and re-reading titles you’d already seen five times. πŸ—‚οΈ Hack 3: Let AI Draft Your Quick Outlines Whether it’s a blog post, an email, or a presentation, running simple AI productivity hacks can completely eliminate the dread of staring at a blank document. The old way: You stare at a blank document for ten minutes before writing a single word, then restructure it three times because the first draft didn’t flow. The mindful AI way: Use AI purely as a structure generator, not a replacement for your voice. Give it your topic and a few rough points, and ask for a simple outline you can then fill in yourself. Try this: “I want to write about [topic]. Here are 3 rough points I want to cover: [list them]. Give me a simple outline with headings I can expand on in my own words.” You’re not asking AI to write the final piece β€” just to remove the blank-page paralysis so you can jump straight into the parts that actually need your voice and judgment. Time saved: easily 30–45 minutes per piece of writing, just by skipping the “where do I even start” stage. ⏳ Add It All Up Let’s do quick, honest math: That’s comfortably 4–5 hours back in your week β€” not from ten new apps, but from three simple, repeatable AI productivity hacks layered into tasks you were already doing anyway. If you’ve read our earlier post on using NotebookLM to organize your notes, these three hacks pair really well with that system β€” think of this as the next layer on top. ⚠️ Common Mistakes That Waste the Time You’re Trying to Save Before you dive in, it’s worth naming a few traps that quietly cancel out the time these hacks are supposed to give back. Mistake 1: Switching tools every week. Every AI tool has a slightly different interface and a slightly different way of phrasing prompts. If you jump from tool to tool chasing whatever’s trending, you spend more time relearning than actually working. Pick one or two tools and stick with them long enough to get fast at using them. Mistake 2: Writing overly long, over-explained prompts. More words in your prompt doesn’t always mean a better result. A short, clear instruction β€” like the ones above β€” usually gets you a cleaner answer than a five-paragraph explanation of exactly what you want. Say what you need,

how-to-use-mem-ai-guide-featured.jpg
Guides

How to Use Mem AI: A Step-by-Step Guide to Setting Up Your Second Brain

Yesterday, we talked about why Mem deserves a spot in your second-brain toolkit β€” the app that organizes your messy, half-formed thoughts without asking you to lift a finger. Today, we’re getting practical. If you read that post and wondered exactly how to use Mem AI to clear your mental clutter, this guide is for you. No jargon. No assumed tech background. Just a clear walkthrough from “never opened the app” to “actually using it daily.” πŸͺ΄ Step 1: Sign Up and Get Oriented Head to Mem’s official website and create your account. You can sign up with email or through Google β€” either works fine. Once you’re in, resist the urge to start “setting things up.” There are no folders to create, no tags to pre-plan, and no complex structures to build before you’re “ready.” That’s the entire beauty of learning how to use Mem AI. Your only job in this step is to land on the blank note screen and feel slightly suspicious that there’s nothing more to configure. There isn’t. Move on. ✍️ Step 2: Write Your First “Messy” Note This is the step most people overthink. Don’t. Open a new note and just write something β€” anything β€” the way it actually exists in your head right now. A half-finished thought. A task you need to remember. Something from a conversation you had this morning. Don’t pause to think about where it “belongs” or whether it’s organized properly. For example, you might write something like: “Need to follow up with the vendor about the Diwali order, also check if Priya’s school fee deadline is this week or next.” That’s it. That’s a real note. Mastering how to use Mem AI starts with writing down two unrelated thoughts exactly as they occurred to you, with zero filing required. πŸ”— Step 3: Let “Related Mems” Do Its Quiet Work As you keep adding notes over the next few days, start paying attention to the sidebar. You’ll notice the app surfacing older notes that relate to what you’re currently typing. This happens automatically β€” you don’t trigger it, search for it, or tag anything to make it work. If you wrote about school fees last week and you’re writing about it again today, the algorithm will likely nudge that older note into view. When discovering how to use Mem AI effectively, simply glance at what it surfaces. You don’t need to act on it every time. Just let it remind you of things you’d otherwise have forgotten you wrote. πŸ’¬ Step 4: Try “Mem Chat” With a Real Question Once you’ve got a handful of notes in the system β€” even just 10 to 15 β€” open the AI chat feature and ask it something real. Not a test question, an actual question you need answered. Try asking: “What did I decide about this month’s content calendar?” or “What was I supposed to follow up on with the vendor?” The system will pull the answer directly from what you’ve already written, instead of you scrolling back through days of scattered notes trying to remember where you wrote it. A great tip for how to use Mem AI chat features is to be as specific as possible; vague questions get vague answers. πŸŽ™οΈ Step 5: Set Up Voice Capture for On-the-Go Thoughts This is the step that quietly changes the most for busy multitaskers. In the app settings, enable voice capture. Now, instead of stopping what you’re doing to type, you can simply speak a thought out loud β€” while doing dishes, folding laundry, or sitting in traffic β€” and it captures it instantly as a note. Test this right now if you can. Open the app, tap the voice option, and say something out loud the way you’d normally think it. Seeing this feature in action is the fastest way to understand how to use Mem AI as a seamless extension of your mind. πŸ“₯ Step 6: Connect Email or Calendar (Optional) If you want the app to start capturing your day’s “knowledge exhaust” automatically β€” meeting notes, quick decisions, follow-ups β€” go into settings and connect your email or calendar. This step is optional, and it’s worth pausing on the privacy note from yesterday’s post here: only connect what you’re genuinely comfortable having an assistant read through. If you’re unsure, skip this step for now and revisit it once you have a better feel for how to use Mem AI on a daily basis. 🌿 Step 7: Build the Daily Habit Here’s the honest truth: this tool only works if you actually use it as your dumping ground for stray thoughts. The software doesn’t fail people β€” people fail to build the habit of opening it. A simple way to start: for the next 7 days, every time you have a half-formed thought you’d normally lose, open the app and write or speak it down, exactly as it occurs to you. No editing. No organizing. Just capture. By the end of the week, ask the chat feature a question about something from earlier in the week. That moment β€” when it pulls up an answer you’d genuinely forgotten β€” is usually when the habit clicks into place for good. βœ… Quick Setup Checklist The Takeaway You don’t need to spend weeks learning how to use Mem AI before it becomes useful. Unlike traditional productivity tools, there’s no steep learning curve standing between you and the benefit. The moment you write your first messy note, you’re already doing it right. The only real skill here is letting go of the urge to organize as you go. Just capture, and let the artificial intelligence handle the rest. If you want to compare this with other clean dashboard setups, check out my guide on the AI-powered daily planner options like Notion or Copilot! Have you tried setting up your workspace yet? Tell me which step felt the most unfamiliar β€” I’d love to know if the “no filing required” part

A woman typing into a ChatGPT chat interface on her laptop with three floating pastel note cards nearby representing the ACT Framework β€” Assign a Role, Give Context, and Target Output β€” illustrating how to write better AI prompts for real-life results.
Guides

The Ultimate Guide to ChatGPT: How to Turn It Into Your Free Personal Life Coordinator

Let me paint you a picture. It’s Sunday evening. You’re sitting with a cup of tea that’s gone lukewarm because you’ve been too busy making a mental list of everything that needs to happen this week. School project. Doctor’s appointment. Grocery run. That pile of laundry. The birthday gift you still haven’t ordered. Dinner for the next five days. And somewhere in the middle of all that, you’re also supposed to, you know, sleep. We talked recently about how AI can genuinely help clear that mental clutter β€” how it can quietly step in and handle the repetitive, logistical thinking that drains us every single day. And the response was so warm, so many of you said “okay but HOW? What do I actually type?” So today, we’re going deep. This is the ultimate guide to chatgpt, your complete, beginner-friendly, no-jargon blueprint to setting up this tool and using it as your very own free personal life coordinator. Whether you’ve never opened it before or you’ve only used it once to write an email and then forgot about it β€” this guide is for you. πŸ› οΈ Step 1: The Ultimate Guide to ChatGPT Setup (The Zero-Cost Way) First, the best news: you don’t need to spend a single rupee to get enormous value out of ChatGPT. The free version is genuinely powerful β€” powerful enough to handle everything we’re going to talk about today. Here’s how to get started in under five minutes: That’s it. No credit card. No complicated setup. No tech skills required. One small tip: once you’re in, take a moment to explore the left sidebar where your past conversations are saved. This becomes important later when we talk about keeping your chats organized for maximum results. πŸ—£οΈ Step 2: The Real Secret to Getting Perfect Results β€” The ACT Framework Here’s something most people never figure out, which is why they try ChatGPT once, get a vague or generic answer, and quietly give up. The quality of what you get from AI depends almost entirely on the quality of what you put in. If you type “give me a dinner recipe” β€” you’ll get something random that might need ingredients you don’t have, take ninety minutes to cook, and feed approximately nobody in your actual household. But if you give ChatGPT real context about your real life? The results are almost shockingly useful. This is where the ACT Framework comes in. It’s a simple three-part structure for writing prompts that get you genuinely good results every single time. A β€” Assign a RoleTell the AI who it’s playing. This sounds a little strange at first, but it works because it helps the AI understand what kind of expertise and tone to bring to the response. Example: “Act as an experienced Indian home cook and budget-conscious meal planner.” C β€” Give ContextThis is the most important part. Explain your actual situation β€” family size, preferences, constraints, time available, ingredients on hand. The more specific you are, the more tailored and useful the response. Example: “I have a family of four. We eat North Indian vegetarian food. I have about 30 minutes to cook after getting home in the evening, and my budget is moderate.” T β€” Target OutputBe precise about what you want back. Do you want a table? A bullet list? A day-by-day plan? A grocery list organized by category? Tell it exactly. Example: “Give me a 3-day dinner menu and a consolidated grocery list broken down by section β€” produce, dairy, dry goods.” When you combine all three parts, you go from getting a generic answer to getting something that feels almost like it was written specifically for your household. Because in a way, it was. πŸš€ 3 Master Prompt Templates You Can Copy-Paste Right Now Okay, this is the part you’ve been waiting for. Here are three ready-to-use prompt templates built specifically for the kind of real-life chaos most of us are managing every day. πŸ₯˜ Template 1: The “Clean Out the Fridge” Meal Planner When to use it: Thursday or Friday evening when you have random bits of vegetables and leftovers and you really don’t want to order takeout again. The Prompt:“Act as a creative, resourceful home chef. I want to meal plan for the next 2 days using only what I currently have in my kitchen. I have these ingredients: [list them β€” e.g., half a block of paneer, 3 tomatoes, a cup of curd, leftover cooked rice, and basic spices]. Suggest 3 simple, comforting meal options I can make without buying anything new. Keep each meal under 30 minutes.” Why it works: Most of us waste more food than we realize simply because we can’t picture what to make with what’s already there. ChatGPT is surprisingly creative with ingredient combinations and will often suggest dishes you wouldn’t have thought of β€” using exactly what you have. πŸ“‹ Template 2: The Sunday “Brain Dump” Organizer When to use it: Any time your head is full and the upcoming week feels like a wall of chaos you can’t see past. The Prompt:“Act as a calm, incredibly organized personal assistant. I’m feeling overwhelmed by everything I need to do this week. I’m going to type a messy, unedited list of tasks and responsibilities. Please organize it into a realistic Monday-to-Friday schedule. My fixed daily routines are: [e.g., school drop at 8 AM, cooking twice daily, blog work for 2-3 hours]. Here’s my messy list: [paste everything β€” no need to organize it first, just dump it all in].” Why it works: The brain dump part is key. You don’t have to sort or prioritize anything before you paste it in β€” that’s literally the AI’s job here. What comes back is a structured, realistic week that accounts for your actual fixed commitments. It also naturally flags when you’ve overpacked a single day, which is something most of us do to ourselves constantly on Sunday evenings. 🧹 Template 3: The Household Chores Distributor When

How to use NotebookLM step by step guide
Guides

How to Use Notebook LM: 6 Best Tips for Your Ultimate Smart Notebook 🌿

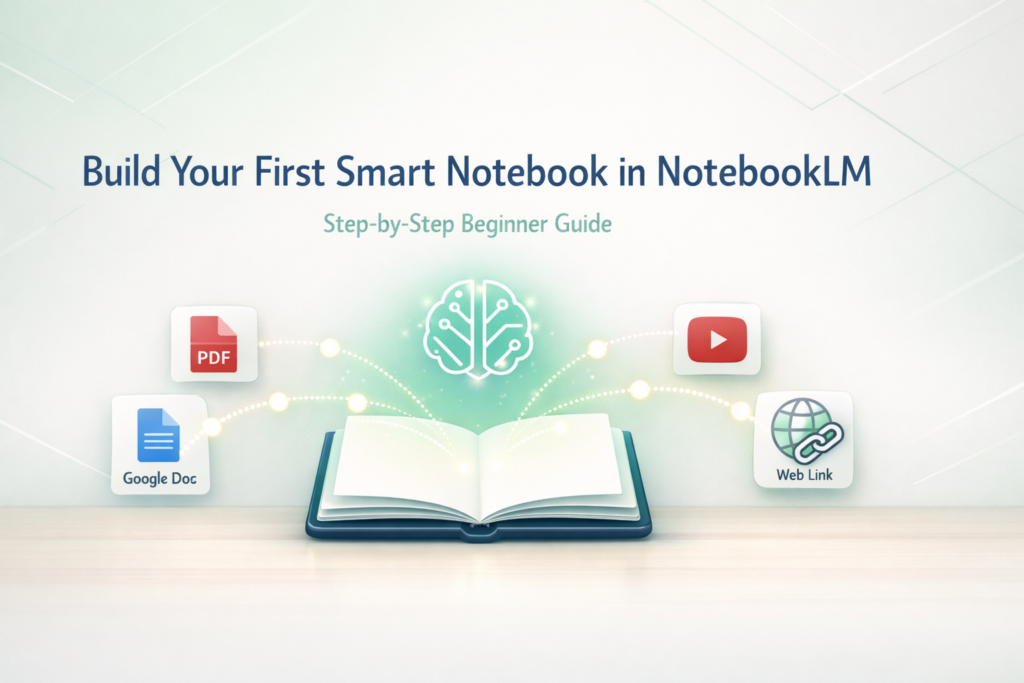
How to Use Notebook LM. If you’ve ever had seventeen browser tabs open, three half-finished Google Docs, a folder full of PDFs you swore you’d read, and a YouTube video paused somewhere in the middle β€” this post is for you. We’ve all been there. The research is technically thereβ€”it’s just… everywhere. And finding the right piece of information at the right moment feels more like archaeology than productivity. Yesterday, right here on the Mindful AI Hacks blog, I introduced you to NotebookLM β€” Google’s free AI research tool that works only with your uploaded documents. If you missed that post, go give it a quick read first. Today, we’re getting our hands dirty by showing you exactly how to use NotebookLM to build a localized AI assistant. This is your complete, beginner-friendly walkthrough for building your very first Smart Notebook in NotebookLM β€” from a blank workspace to a fully interactive AI research hub. Let’s go! πŸš€ Think of it this way: a regular notes app is like a filing cabinet. You put things in, and they just… sit there. Passive. Silent. Waiting for you to remember they exist. A Smart Notebook in NotebookLM is completely different. It’s more like a research assistant who has personally read every single document you’ve handed them β€” and is ready to answer questions, spot connections, and pull out insights on demand. The one golden rule that makes this work? Source-grounding. NotebookLM only uses the files you upload. It won’t wander off to the internet or make things up. Every answer it gives you comes directly from your documents β€” and it will show you exactly where it found the information. That’s what makes it trustworthy, and that’s what makes it genuinely useful. βœ… Step 1: Set Up Your Workspace (How to Use Notebook LM Let’s start from scratch. A fresh, blank workspace will open β€” along with a prompt asking you to add your first sources. That’s it. You’re in. Clean slate, ready to go. πŸ“‚ Step 2: Feed the AI β€” Add Your Sources Here’s where the magic actually begins. Your notebook is only as useful as what you put into it β€” so let’s load it up. NotebookLM accepts a surprisingly wide range of formats: 🎯 Your Action Step: Pick one specific project β€” maybe “Tax Planning 2026”, “Learning a New Skill”, or “Blog Research for Next Month.” Upload just 2 to 3 files or links related to that topic. Keep it focused to start. 🏷️ Step 3: Organize with Smart Labels Once your files are uploaded, they’ll appear in the Sources sidebar on the left. A couple of things to know here: πŸ’¬ Step 4: Start Chatting with Your Documents Okay β€” this is the part that genuinely feels like a superpower the first time you try it. As soon as your sources are processed, look at the Chat Panel at the bottom of the screen. NotebookLM will immediately show you an auto-generated summary of everything you’ve uploaded. From there, you can ask it anything. Some prompts that work really well: Every single answer comes with numbered citations. Click any citation and it jumps you straight to the exact paragraph or timestamp in your source. You can fact-check the AI in seconds. No more wondering, “Wait, where did I read that?” πŸŽ›οΈ Step 5: Use the Studio Panel to Create Real Assets This is where NotebookLM goes from “impressive” to genuinely wow. Head over to the Studio Panel on the right side of your screen to turn your raw research into something you can actually use and share. πŸŽ™οΈ Audio Overviews β€” Your Personal AI Podcast Click “Generate Audio Overview” and NotebookLM transforms your documents into a natural, engaging podcast-style conversation between two AI hosts. They discuss your content, use analogies, and make even the driest research actually enjoyable to listen to. πŸ“Š Reports and Spreadsheets Need a formal summary, an executive briefing, or a structured data table? Click Reports and the AI suggests dynamic report formats based on your content. You can export directly to Google Docs or Google Sheets in one click. πŸ–₯️ Slide Decks & Infographics Need to present your research? The Slide Deck tool builds a complete presentation narrative from your uploaded sources. Export to PowerPoint (.pptx) or PDF and save yourself hours of staring at a blank slide. 🀝 Step 6: Share and Collaborate Research doesn’t always happen alone. Once your notebook is set up, click Share in the top right corner. This is incredibly useful for team projects, study groups, or even collaborating with a virtual assistant. πŸ’‘ Quick Tips Before You Dive In A few things I wish someone had told me when I started: 🎯 You’re Ready to Build Honestly? Setting up your first Smart Notebook takes less than five minutes. But the hours it saves you β€” no more skimming the same PDF three times, no more “where did I save that?” panic β€” are very real. Pick a project that’s been sitting on your mental to-do list. Drop your documents in. Ask your first question. And if you’re feeling adventurous, hit that Audio Overview button and listen to your research like a podcast on your next walk! 🎧 Have you built your first Smart Notebook yet? What project are you starting with? Drop it in the comments β€” I’d love to hear! πŸ‘‡

AI Knowledge Graphs vs Traditional Folders
Guides

AI Knowledge Graphs vs Traditional Folders: Why Your File System Holds You Back 🌿

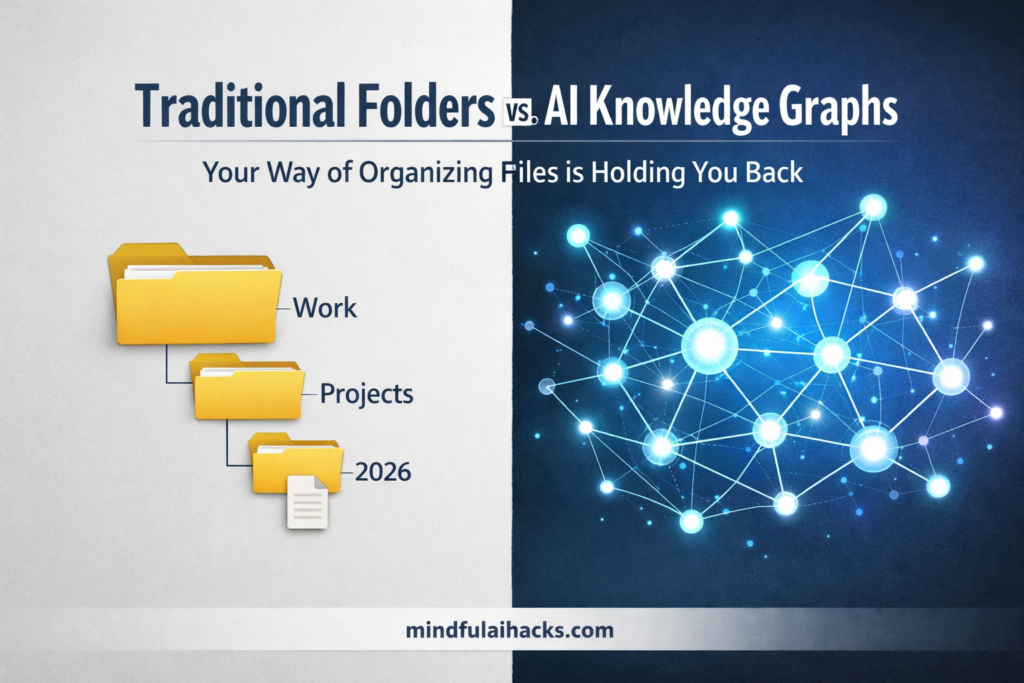
Let me ask you something. When deciding between AI Knowledge Graphs vs Traditional Folders, it quickly becomes obvious that the old way of organizing files is holding you back. Do you have a folder on your computer called “Work”? And inside it, another folder called “Projects”? And inside that, a folder called “2026” β€” with one lonely document sitting there that you haven’t touched in months? Yeah. We’ve all been there. Now imagine you need to find something specific β€” a great idea you saved, a research note, or a blog topic. What do you do? You start clicking through folder after folder, hoping you remember where you put it. That whole experience? That’s called a hierarchical folder system. And honestly β€” it’s exhausting. Here’s the thing: this system was designed for paper files and filing cabinets back in the 1980s. We’ve been using it on computers ever since without really questioning it. It’s time to question it. πŸ“‚ Why Traditional Folders Actually Work Against You The biggest problem with rigid folders is simple: one file can only live in one single place. Say you save a note about an AI tool. Where does it go? You have to pick one. And the moment you do, that note gets cut off from everywhere else it could be useful. Over time, this creates three real problems: 🧠 How Your Brain Thinks (An Intro to AI Knowledge Graphs vs Traditional Folders) Here’s something interesting: your brain doesn’t work in folders. When you think of the word Minimalism, your brain doesn’t open a mental drawer labeled “Minimalism.” Instead, it instantly connects to related ideas β€” simple living, saving money, clearing clutter, feeling calm. One thought links to many others at once. That’s called thinking in connections. And when analyzing AI Knowledge Graphs vs Traditional Folders, that is exactly where the graph system wins. Instead of forcing every note into a single folder, a knowledge graph treats each piece of information like a dot β€” and draws lines between dots that are related. So if you save a note about a budgeting tool, it automatically connects to your notes on financial planning, productivity apps, and maybe even your blog draft on saving money. You don’t have to manually link any of it. ⚑ The Power of AI Knowledge Graphs vs Traditional Folders Modern productivity tools are moving fast toward connected systems. If you look at the core differences between AI Knowledge Graphs vs Traditional Folders, adding artificial intelligence to your notes changes everything. Three powerful things happen when you switch: πŸ“Š Side-by-Side Comparison Feature Traditional Folders AI Knowledge Graphs Structure Rigid, tree-like Flexible, web-like Storage Model One note lives in one folder only Connected to many topics simultaneously Finding Files Click through folders or guess keywords Ask naturally, AI finds it instantly Upkeep Constant manual effort AI handles connections for you Best For Old tax files, static receipts Active ideas, research, blog planning πŸ› οΈ How to Start Using AI Knowledge Graphs vs Traditional Folders You don’t need to delete everything and start over. Just take it one step at a time to ease into a workspace built around AI Knowledge Graphs vs Traditional Folders. 🎯 The Bottom Line You’re dealing with more digital information today than ever before. Stuffing it all into a folder system designed for physical paper files is just making your life harder. When you weigh the benefits of AI Knowledge Graphs vs Traditional Folders, you realize you don’t have to play the role of a file clerk anymore. You let the AI handle the heavy lifting of organizing, freeing your brain up for the good stuff: thinking, creating, and connecting ideas. Take a look at your desktop right now. If it looks like a maze of nested folders, pick just one project and try moving it into a connected tool. You might be surprised how much lighter your brain feels. Have you tried using a graph-based note system yet? Drop a comment below and let’s chat about it! πŸ‘‡

perplexity
Guides

Perplexity AI Collections: 4 Steps to Customize Your Research 🌿

Using Perplexity AI Collections is the absolute best way to streamline your digital workflows and gather deep, web-grounded research without drowning in open tabs. Whether you are analyzing the market, gathering sources for an academic paper, or exploring competitive intelligence, managing information across dozens of open browser windows can be a major distraction. Standard AI chatbots often make this problem worse. They treat each conversation as a completely separate event, forcing you to re-enter your project details, target personas, and formatting rules every single time you start a new thread. Enter Perplexity AI Collections, also known as Spaces in the modern platform interface. Instead of treating AI searches as a series of disconnected text boxes, these specialized hubs let you create persistent research ecosystems specific to your project. By customizing these hubs with clear instructions, targeted source filters, and uploaded reference files, you can turn Perplexity into a tailored research assistant. This assistant remembers your project context, adheres to your output rules, and maintains a consistent analytical approach across various workflows. This guide provides a detailed, step-by-step outline for building, configuring, and optimizing your workspace for professional or academic project research. πŸ—οΈ Understanding the Architecture of Perplexity AI Collections To make the most of a customized hub, it’s helpful to understand how it changes the usual behavior of the underlying AI. In a regular, standalone search thread, the model starts completely fresh with each prompt. It relies on your global profile settings but lacks specific context about your current project goals. When you bundle threads within Perplexity AI Collections, you create a dedicated workspace. Every thread started within this workspace automatically inherits three key elements: By establishing this dedicated environment, you ensure that your research stays focused, well-contextualized, and free from the common formatting issues found in unconfigured AI models. πŸ› οΈ Setting Up Your Specialized Research Workspace Setting up a new workspace takes less than a minute, but careful execution helps prevent future organizational clutter. Follow these steps to create your research hub: πŸ“ Prompt Engineering for Collection Instructions The real strength of customized Perplexity AI Collections lies in the system instructions. This text field requires the AI model, whether it’s Claude, GPT, or another reasoning engine, to consistently take on a specific role and output format. When writing your instructions, avoid vague phrases like “Be helpful, thorough, and precise.” Instead, provide clear directions, specific sourcing rules, and structural formatting guidelines. Key Elements of an Effective Instruction Framework To create a reliable set of instructions, ensure your prompt covers these four areas: Production-Ready Instruction Templates You can copy, paste, and adjust these templates based on your project type: πŸ” Maximizing Efficiency with Focus Filters Perplexity provides built-in Focus Filters at the initialization of individual threads within your workspace. Restricting the AI’s search perimeter from the outset prevents your project from being cluttered with low-value, SEO-optimized web spam or shallow blog articles. Focus Filter Primary Source Materials Checked Best Project Research Use Case Academic Semantic Scholar, arXiv, PubMed, and leading global scientific journals. Deep theoretical research, historical validation, and auditing peer-reviewed proofing. Writing None (Executes purely localized generation using the underlying LLM’s static weights). Draft text, rewriting rough notes, or formatting raw data into formal reports. All (Default) The entire indexed public web canvas, news sites, and company homepages. Real-time market positioning, tracking breaking industry news, or identifying policy shifts. YouTube / Reddit Public video transcripts, developer subreddits, and open community forums. Qualitative sentiment mining, mapping real-world user pain points, and product UX case studies. πŸ’Ύ File Upload Anchors and Long-Term Memory Protocols A common point of confusion among research teams is understanding how memory works across different threads within a single collection folder. Threads inside Perplexity AI Collections act as organized, searchable storage compartments. However, each new chat thread starts a fresh contextual memory loop. A new thread does not automatically read or scan the text transcripts of other threads in the same folder. Instead, continuity between parallel threads relies on two main elements: your global Custom AI Instructions and your Uploaded Reference Files. The File Upload Strategy To turn your collection folder into a cohesive knowledge engine, use the file upload feature as a permanent anchoring tool. You can upload files up to 25MB directly to the main workspace settings page. πŸš€ Advanced Features for Power Users When managing complex research inside your Perplexity AI Collections, you can leverage two advanced system behaviors to extract the highest value from the web: Preserving Breakthroughs via “Convert to Page” When a specific, in-depth conversation inside your workspace leads to a major research breakthrough, a large data compilation, or a well-structured report, do not let it get lost in a long chat transcript. Use Perplexity’s Convert to Page feature. This tool turns the raw conversation history into a clean, standalone web document. You can refine this document, add subheadings, include additional notes, and pin it to the top of your workspace directory. Deep Research Mode (Autonomous, Multi-Step Investigation) For the foundational discovery phase of your project, activate Deep Research mode within your Perplexity AI Collections threads. Instead of executing a superficial search and summarizing the first three links it finds, Deep Research allows Perplexity to act as an autonomous agent. It will systematically execute dozens of sequential, parallel queries over several minutes, follow citation trails down deep digital rabbit holes, cross-verify conflicting metrics, and compile a massive, thoroughly comprehensive research report. 🎯 Summary Checklist for a High-Performance Collection To ensure your workspace is fully optimized before diving into your next research sprint here on Mindful AI Hacks, verify that you have checked off the following four operational steps: By taking ten minutes to map out your custom parameters and anchor your core documents within Perplexity AI Collections, you eliminate repetitive prompt engineering and transform your research workflow from an endless sea of scattered browser tabs into a precise, automated knowledge engine.

Scroll to Top